


� 2019 JimVonBaden/JVB Productions
�
Final Drive Fluid Service
If you are interested in a video version of this pictorial, as well as the entire R1200 36K maintenance required, please see the DVD Info Sales button at the top of this page!
Caution: This pictorial is for informational purposes only. I accept no responsibility for accuracy, or any damage caused to your motorcycle if you choose to perform these maintenance items.
After finding out that the 07 R1200 series bikes will require an oil change at 600 miles, I decided to change my 05 "permanent" oil, then at 20K miles, just in case. BMW Now recommends a FD oil change every 12K miles.
Here are the steps:
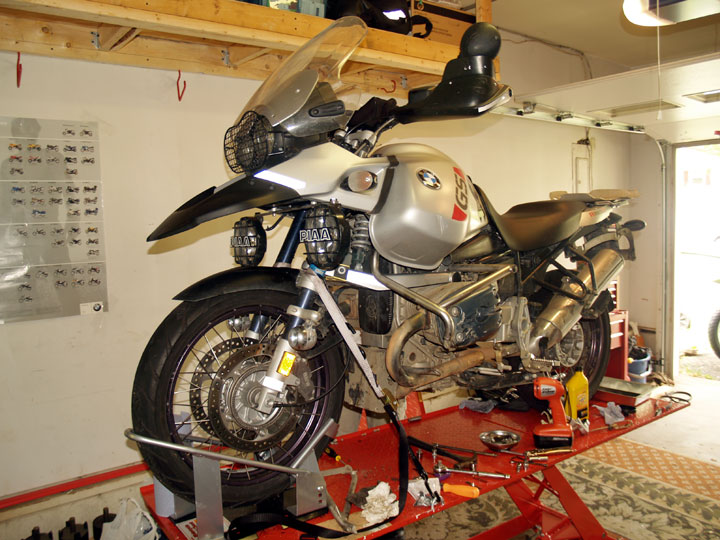
1. Remove the fender (GS models only).
If you are interested in a video version of this pictorial, as well as the entire R1200 36K maintenance required, please see the DVD Info Sales button at the top of this page!
Caution: This pictorial is for informational purposes only. I accept no responsibility for accuracy, or any damage caused to your motorcycle if you choose to perform these maintenance items.
After finding out that the 07 R1200 series bikes will require an oil change at 600 miles, I decided to change my 05 "permanent" oil, then at 20K miles, just in case. BMW Now recommends a FD oil change every 12K miles.
Here are the steps:
1. Remove the fender (GS models only).
2. Remove the rear wheel (T-50 Torx).
3. Unbolt the Brake Caliper (T-45 Torx) and hang it with some wire to the frame.
Note: This sensor build-up looks bad, but really isn't. That is a normal amount of accumulation for 20K miles and never changed. It looked much better the second and third time. It should have no grit in it, just feel like wet talc.
4. Remove the rear speed sensor, both screws (T-25 Torx) and the clip, and hang it with the brake caliper.
5. Remove oil drain plug, and drain off the oil. (Note the new 08-09 bikes have a drain at the bottom, and do not require the FD be dropped unless you want to lube the driveshaft splines.)
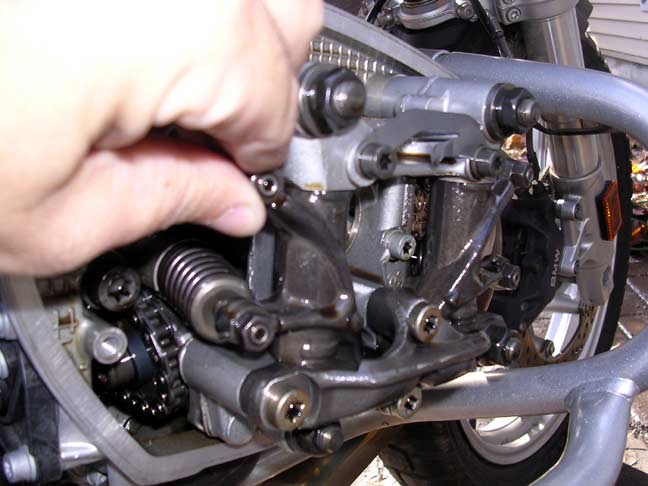
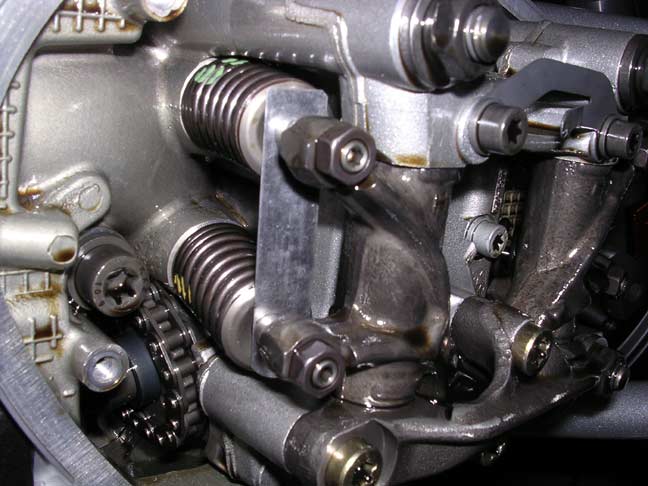
6. Release the paralink at the rea (it's now flopped down, with the fill plug at the bottom)The drive shaft comes out easily, but you may need to push it down a bit to get it to release. The Release bolt is a T-50 Torx and a 17mm locknut.
7. Clean the drive shaft and FD input shaft, then add Moly 60, or equivalent lube, to the shaft and splines.
8. Install the rubber gaitor, pivot the rear-wheel drive up and introduce the bevel-pinion shaft into the universal drive shaft. If necessary, turn the FD gently back and forth to facilitate this operation. (This is made way easier if you have the bike in neutral.) I took half an hour to figure this out, and it still took a few minutes). Also, if you are having trouble, pull the gaiter off and test fit it, then reinstall the gaiter and it will go on easier.
9. Reconnect the paralever link. (Install the bolt and nut and torque it down to 43 nm.) BMW Recommends you replace the nut every time.
10. Clip the gaiter back in place. There is a plastic clip inside both ends of the gaitor.
10. Clip the gaiter back in place. There is a plastic clip inside both ends of the gaitor.
11. Put the drain plug back in, after you clean it and put some oil on the O-ring. T-45 Torx, torqued to 8nm.
I was given this bottle later, and it works great! Plus it is marked for the right amount!
12. Fill the final drive with oil via the speed sensor hole, with .18 liters of fluid. (Do it VERY slowly. The oil will not go in fast, and will come back out the hole and run all over the place. ) Later I found a small graduated bottle from a beauty salon with an angled tip that worked much better, see above. (Note: The new 08 and later bikes have a separate filler a few inches to the left of the sensor hole. On the 07+ there is a fill plug on the wheel side, either at 2PM or at 11PM, torque to 20nm.)
13. Clean and oil the speed sensor O-ring and put it in the final drive, followed by the greased speed sensor and then install the screw, the clamp screw, and the clip.
14. Install the caliper, torque to 24 nm, remember to reinstall the fender holder on the lower bolt. Use the fender bolt to line it up.
15. Install the wheel, torque the T-50 Torx to 60nm.
16. Install the rear fender (GS only), and make sure to start all three screws before tightening them down.
16. Install the rear fender (GS only), and make sure to start all three screws before tightening them down.
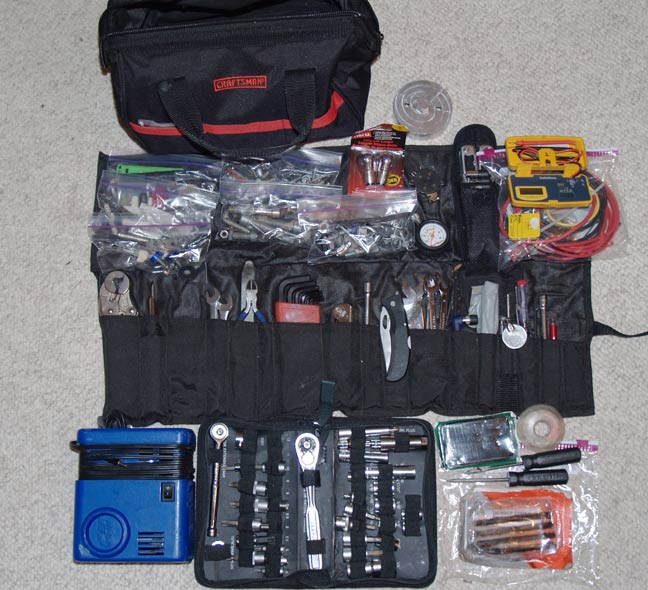
Tools needed:
16mm Socket and ratchet
Torx Sockets:
T-50, T-45, T-30, T-25
3/8� 3� extension
�� 6� extension, depending on your Torx socket set
Torque Wrench
Flat blade screw driver
Measuring cup
Supplies:
� Paper Towels, lots of them
� Synthetic gear oil, 75/90
� Honda Moly 60 grease
� Q-tip
� Bolt holder
� Wire, or coat hanger
Here is the old oil. It was definitely darker than the new, but not bad for 20K miles, at 32K it looked like new. There were no shavings in the old oil, and the little amount of fuzz on the speed sensor was negligible.
I have now done dozens of these, and it get's easier all the time!
Overall it should take less than an hour, and is not too bad. Just make sure you have all the tools you need, and plenty of paper towels!
Jim
If you are interested in a video version of this pictorial, as well as the entire R1200 36K maintenance required, please see the DVD_Info Sales button at the top of this page!
Download a PDF of this process!


JVB Productions
Motorcycle Maintenance and Repair Videos